Plastic, Medical
Electronic Housings & Silicone Mouldings
Background and Overview
Some projects require parts that are soft, elastic, or optically clear - qualities normal 3D printing cannot achieve with standard materials. Even though flexible filaments exist, they don’t behave like true silicone, so an alternative approach is to mix two-part materials and cast them inside custom moulds. These moulds are 3D printed and designed so the material can be injected from the top, and when higher accuracy is needed, the parts can be vacuum cast to help the mixture settle properly throughout the cavity. This method also works for other two-part systems, including clear epoxies, but the tooling design must be adapted for each material’s behaviour.
Two projects that have benefited from this approach are the Dormio Dream Incubator, which needed a flexible, hypoallergenic housing for its PCB, and the BoB Beacon, which required optically clear lensing for testing.
Methodology
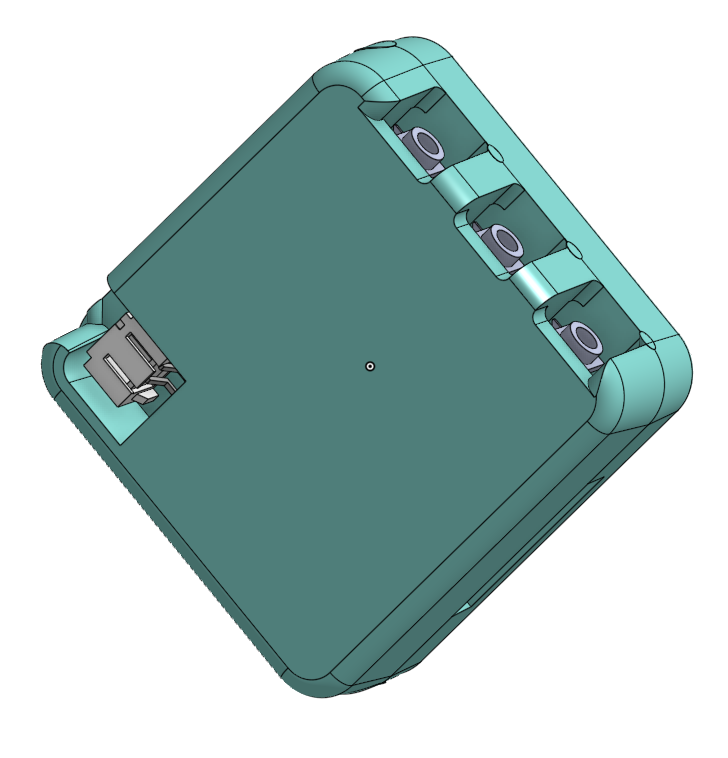
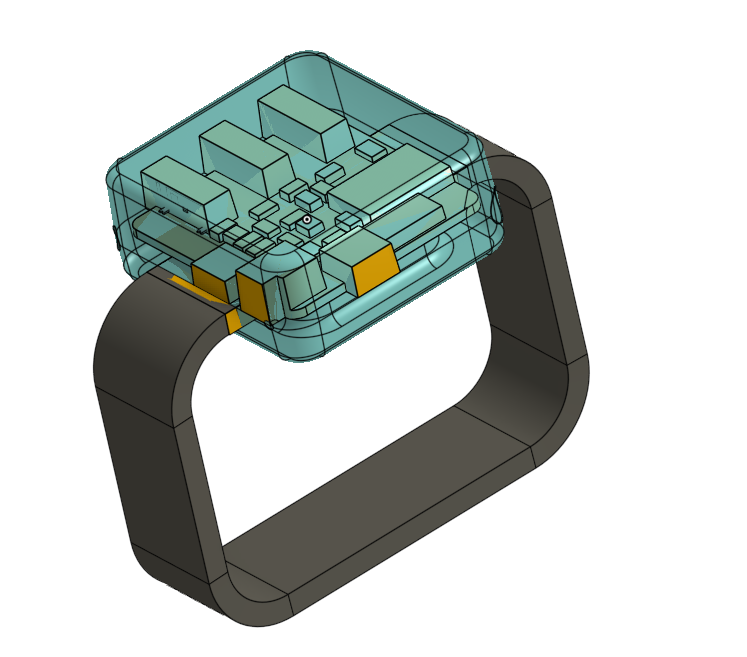
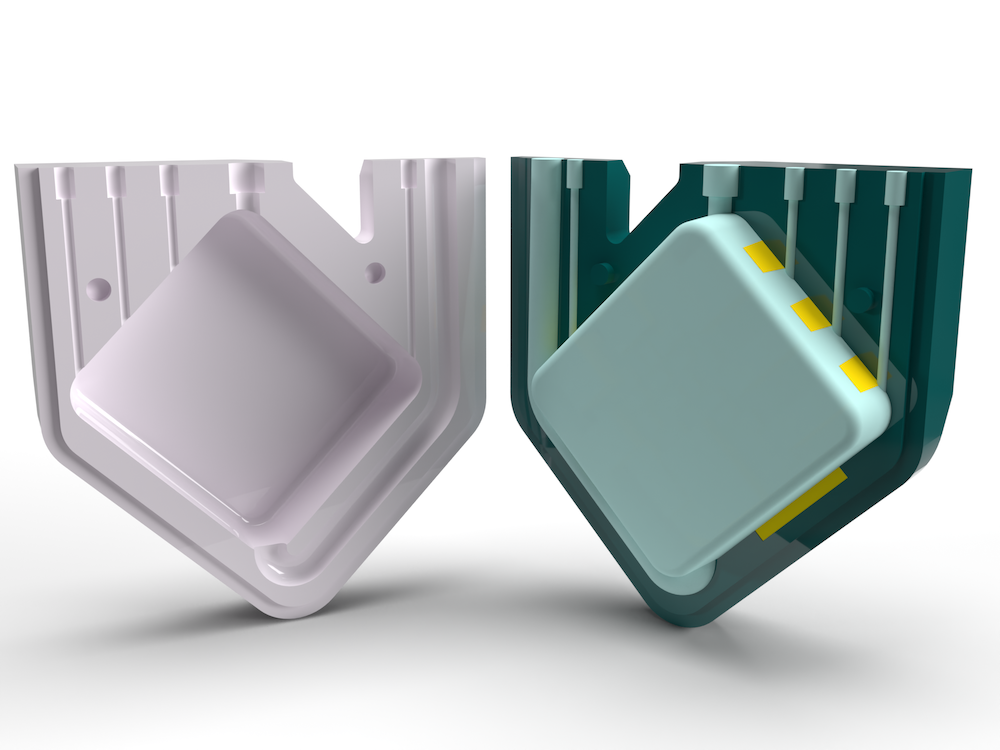
For the Dormio Dream Incubator project, the client required a soft, hypoallergenic silicone housing for the PCB. It needed to sit comfortably on the wrist, protect the PCB, and allow all straps, inputs, and outputs to function correctly. Standard 3D printing could not deliver the necessary elasticity or skin-safe materials needed for this prospective medical device, so our team chose silicone casting. We began by creating a CAD model of the PCB and designing the housing around it. Then, we developed a 3D-printed mould for top-side silicone injection, with vacuum casting applied to help the material settle evenly. Our team constructed a 3D-printed mould to encapsulate the housing, and then modified the mould to optimise it for the silicone casting process.
Results Discussion
The finished silicone housing fit the PCB securely, allowed the strap and all inputs and outputs to function, and provided a soft, functional, and medically safe component ready for early user trials. By combining CAD-led housing design with 3D-printed moulds and silicone casting, the project created a flexible “skin” for the PCB that could not have been produced with standard 3D printing alone. Overall, this process showed that combining careful design with moulding and casting techniques can produce reliable prototypes and functional components in projects where standard 3D printing reaches its limits.
Some projects require parts that are soft, elastic, or optically clear - qualities normal 3D printing cannot achieve with standard materials. Even though flexible filaments exist, they don’t behave like true silicone, so an alternative approach is to mix two-part materials and cast them inside custom moulds. These moulds are 3D printed and designed so the material can be injected from the top, and when higher accuracy is needed, the parts can be vacuum cast to help the mixture settle properly throughout the cavity. This method also works for other two-part systems, including clear epoxies, but the tooling design must be adapted for each material’s behaviour.
Two projects that have benefited from this approach are the Dormio Dream Incubator, which needed a flexible, hypoallergenic housing for its PCB, and the BoB Beacon, which required optically clear lensing for testing.
Methodology
For the Dormio Dream Incubator project, the client required a soft, hypoallergenic silicone housing for the PCB. It needed to sit comfortably on the wrist, protect the PCB, and allow all straps, inputs, and outputs to function correctly. Standard 3D printing could not deliver the necessary elasticity or skin-safe materials needed for this prospective medical device, so our team chose silicone casting. We began by creating a CAD model of the PCB and designing the housing around it. Then, we developed a 3D-printed mould for top-side silicone injection, with vacuum casting applied to help the material settle evenly. Our team constructed a 3D-printed mould to encapsulate the housing, and then modified the mould to optimise it for the silicone casting process.
Results Discussion
The finished silicone housing fit the PCB securely, allowed the strap and all inputs and outputs to function, and provided a soft, functional, and medically safe component ready for early user trials. By combining CAD-led housing design with 3D-printed moulds and silicone casting, the project created a flexible “skin” for the PCB that could not have been produced with standard 3D printing alone. Overall, this process showed that combining careful design with moulding and casting techniques can produce reliable prototypes and functional components in projects where standard 3D printing reaches its limits.
CAD design for PCB integration
3D-printed mould tooling
Silicone injection and vacuum casting
Material selection for hypoallergenic components
Prototype fabrication for user trials
3D-printed mould tooling
Silicone injection and vacuum casting
Material selection for hypoallergenic components
Prototype fabrication for user trials
"By pairing tailored moulds with silicone casting, we created a reliable, flexible component that standard 3D printing could not achieve."
.png)